Multi block printing is a method of using separate lino blocks to produce an image/design; each block is only part of the whole design but when printed on top of another the final image/design is created.
This allows for some great techniques and effects that you wouldn’t necessarily get from the reduction process. One other major benefit is the blocks can be kept and used repeatedly to make multiple Editions.
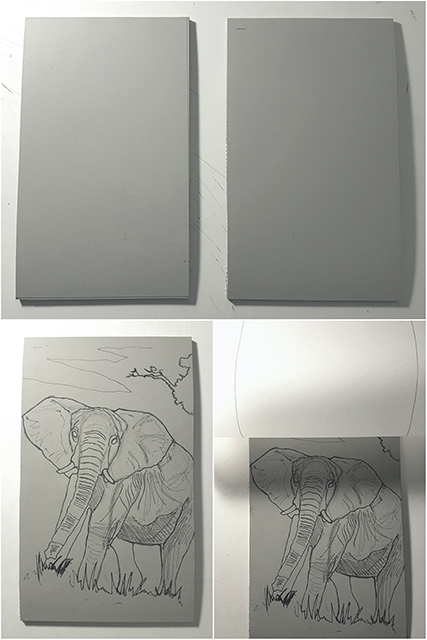
Step 1
For this Elephant print I’m using 2 blocks; one for a simple background and one for the body of the elephant. First I measure and cut two blocks the same size.
I used several photo’s for the elephant as reference and just drew straight onto the lino; I wanted just enough detail to have a pretty life like representation. Once I was happy with the elephant design, I placed the block in my window template (the window template is for registration when printing).
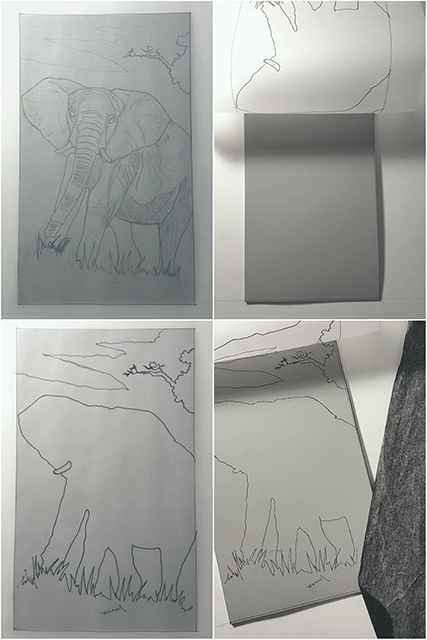
Step 2
I taped down some tracing paper and traced around the shape of the elephant and background elements, I’m not interested in the details. Next I placed the second block for the background in the template and using carbon paper I transferred the outline onto the block.
Step 3
So now I have the two blocks with the design ready to cut, they should also (hopefully!!!) match up pretty well when it comes to printing. I decided to cut the background block first; the way I like to do this is to cut just inside the outline with a 1mm tool. Once I’ve gone round the entire outline I use a larger flat tool and cut towards the edge. Once I’ve cut away everything I go back and tidy up any edges.
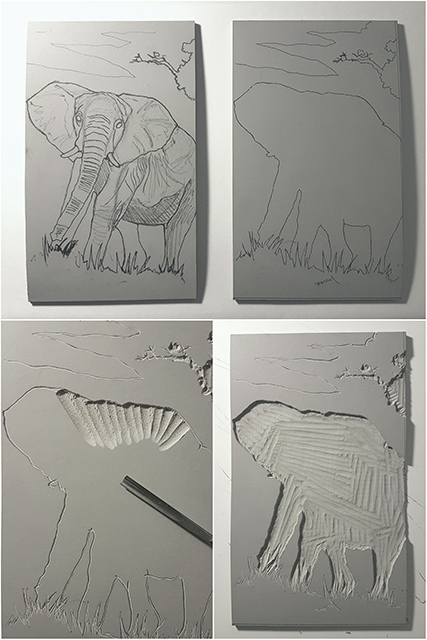
Step 4
Now to the elephant block, just in the same way as before I used a 1mm tool to cut just outside the outline and then cleared away any unwanted lino with a larger flat tool. For the details of the elephant I used more of a scratching and cross hatching technique to replicate the elephants skin. When I proof print I’ll know how successful this is, I may need to do some more cutting.
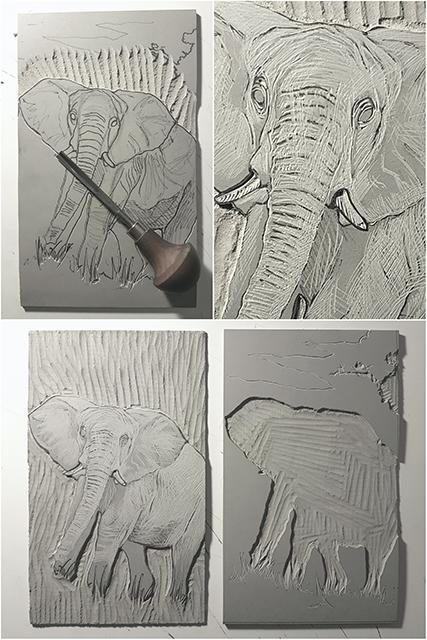
Both blocks are now ready for printing where I will go into more depth on proofing and registration [read Part 2 here].